
Upgrades and modules
How tier kits and modules make machines faster, cheaper to run and able to do more at once.
Machines upgrade two ways. A tier kit raises the whole machine a level, and modules tune it: faster, cheaper per item, or working on several items at once. Both go in the slots on a machine's Upgrades tab, and both stay with the machine when you pick it up.
Tier kits#
There are four kits, and each is crafted from the one before. Use a kit on a machine (or put it in the top-left slot of the Upgrades tab) and the machine's front jewel takes the tier's colour. A kit goes straight on: there's no need to fit the lower tiers first, and fitting a new kit hands the old one back.
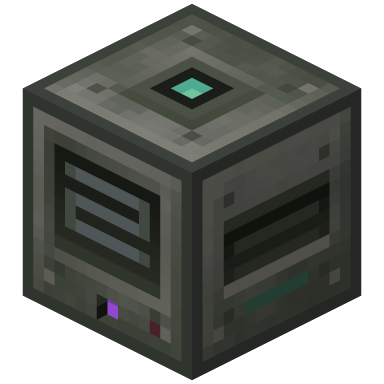
Each tier multiplies how fast a machine works (and the power it draws) and its energy buffer, and opens two more module slots:
| Tier | Kit | Power use | Buffer | Module slots |
|---|---|---|---|---|
| Base | None | 20 FE/t | 20,000 FE | 0 |
| Tempered |  Tempered Upgrade Kit Tempered Upgrade Kit | 40 FE/t | 40,000 FE | 2 |
| Fortified |  Fortified Upgrade Kit Fortified Upgrade Kit | 60 FE/t | 80,000 FE | 4 |
| Luminous |  Luminous Upgrade Kit Luminous Upgrade Kit | 80 FE/t | 160,000 FE | 6 |
| Harmonic |  Harmonic Upgrade Kit Harmonic Upgrade Kit | 120 FE/t | 320,000 FE | 8 |
 Celerity Module · up to 8
 Economizer Module · up to 8
 Manifold Module · up to 2
 Crafting Table
 Crafting Table

 Crafting Table
 Crafting Table


Modules#
Most machines have a grid of eight module slots, locked until a tier kit opens them (two per tier). Any mix of the modules a machine accepts can go in, up to a limit per module so that none goes to waste. Using a module on a machine drops it into the first free slot. A few machines have their own dedicated slots instead: the Aquifer and Voltaic Cell, for example.
Numbers are how many of each module a machine can use; hover a column's icon for its name.
| Machine | Tier kit | Celerity Module | Economizer Module | Manifold Module |  Irrigation Module Irrigation Module |  Lumen Module Lumen Module |  Tesla Module Tesla Module |  Feeder Module Feeder Module |  Filtration Module Filtration Module |  Void Module Void Module |  Kelp Module Kelp Module |  Infusion Module Infusion Module |
|---|---|---|---|---|---|---|---|---|---|---|---|---|
 Aquifer Aquifer | Yes | · | · | · | 4 | 4 | · | · | · | · | · | · |
 Caloric Engine Caloric Engine | Yes | 4 | 4 | · | · | · | · | · | · | · | · | · |
 Ecotone Ecotone | Yes | · | · | · | · | 1 | · | 4 | 4 | 1 | 1 | 1 |
 Eddy Smelter Eddy Smelter | Yes | 8 | 8 | 2 | · | · | · | · | · | · | · | · |
 Igneous Engine Igneous Engine | Yes | 4 | 4 | · | · | · | · | · | · | · | · | · |
 Ignition Engine Ignition Engine | Yes | 4 | 4 | · | · | · | · | · | · | · | · | · |
 Kerf Mill Kerf Mill | Yes | 8 | 8 | 2 | · | · | · | · | · | · | · | · |
 Kettle Engine Kettle Engine | Yes | 4 | 4 | · | · | · | · | · | · | · | · | · |
 Resistive Kiln Resistive Kiln | Yes | 8 | 8 | 2 | · | · | · | · | · | · | · | · |
 Spawning Basin Spawning Basin | Yes | · | · | · | · | · | · | · | · | · | · | · |
 Triturator Triturator | Yes | 8 | 8 | 2 | · | · | · | · | · | · | · | · |
 Voltaic Cell Voltaic Cell | Yes | · | · | · | · | 4 | 1 | · | · | · | · | · |
 Vortex Separator Vortex Separator | Yes | 8 | 8 | 2 | · | · | · | · | · | · | · | · |
- Celerity Module: faster, at a higher cost per item.
- Economizer Module: cheaper per item, with a bigger energy buffer.
- Manifold Module: opens two more lanes each, so a processing machine works on up to five stacks at once.
- The others belong to particular machines: Irrigation and Lumen on the Aquifer, Tesla on the Voltaic Cell, and Feeder, Filtration, Void, Kelp and Infusion on the Ecotone.
How Celerity and Economizer add up#
A worked example first. The Triturator spends 20 FE/t at the base tier, and grinding one ore costs 4,000 FE, so it takes 10 s.
| Modules | Time per ore | FE per ore | Power use |
|---|---|---|---|
| None | 10 s | 4,000 FE | 20 FE/t |
| 2 Celerity | 5 s | 8,000 FE | 80 FE/t |
| 2 Celerity, 2 Economizer | 5 s | 4,000 FE | 40 FE/t |
So Celerity buys speed with power, and Economizer pays the power back. Equal numbers of each cancel out on cost: twice as fast for the same FE per item. The rules, for those who like them:
- Speed = tier rate × (1 + 0.5 × Celerity)
- FE per item = recipe energy × (1 + 0.5 × Celerity) ÷ (1 + 0.5 × Economizer)
- Buffer = tier buffer × (1 + 0.5 × Economizer)
Work it out for any machine#
Pick a machine, a tier and its modules. The numbers use your pack's defaults as this site was built.
Engines trade differently: Celerity raises their output and Economizer stretches their fuel. The Caloric Engine's page works it through.
Module recipes#
Crafting Table Crafting Table
 Crafting Table

Good to know#
- A module left in a slot that a kit no longer opens stops counting until you take it out.
- Hover a locked slot to see which kit opens it; hover a module in your inventory to see what it would do in the machine you have open.
- Upgrades, stored energy, settings and side configuration all stay on a machine you pick up with the
 Calibration Tablet.